Wednesday, November 13, 2024

Building a Wooden Dinghy on a Budget: Affordable Tips

Building a Wooden Dinghy on a Budget: Affordable Tips

Building a Wooden Dinghy on a Budget: Affordable Tips

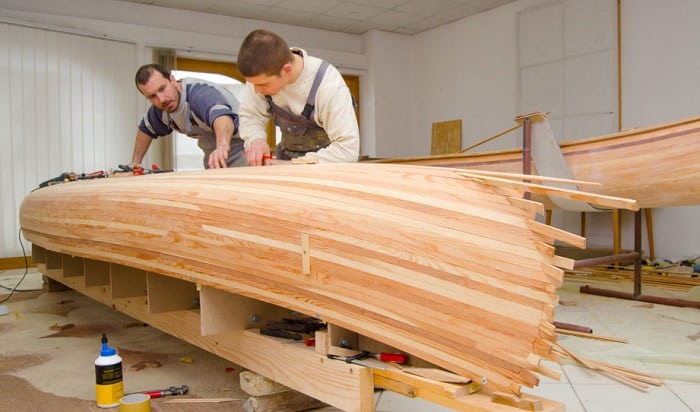
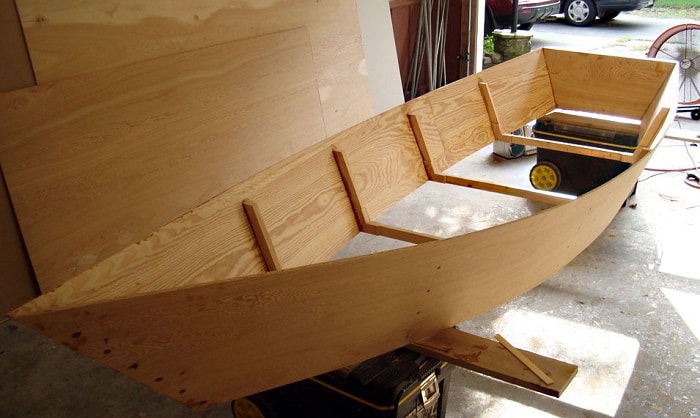
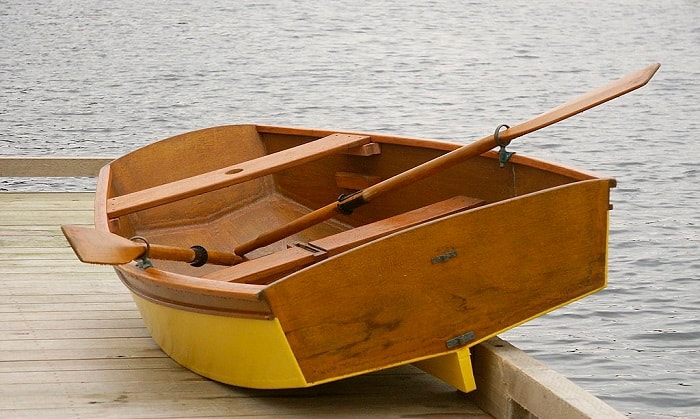
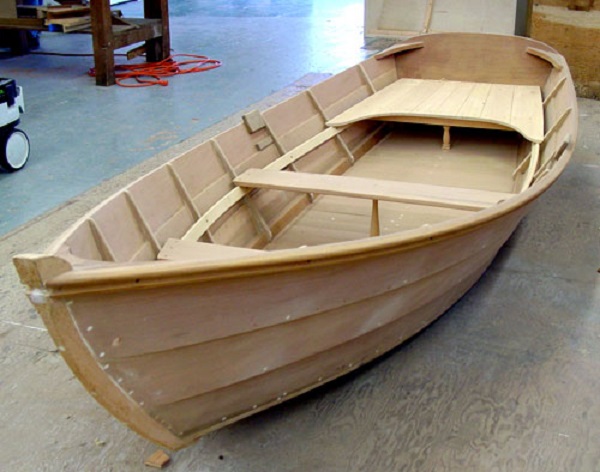
Embarking on a wooden dinghy building project is an endeavor filled with immense satisfaction, but the financial aspect can sometimes be daunting. This comprehensive guide explores practical tips for constructing a wooden dinghy on a budget, ensuring a fulfilling and affordable experience.

Planning and Design

The initial planning phase is crucial for budget-conscious boatbuilding. Consider these points:

Choose a Simple Design

Opting for a straightforward dinghy design minimizes material usage and construction complexity. Simple designs like the classic "Peapod" or "Skiff" are excellent starting points. These designs are easily adaptable and can be found in readily available plans.

Explore Free or Inexpensive Plans

Numerous free and budget-friendly dinghy plans are accessible online or through books. Websites like "WoodenBoat" and "Boatbuilding Forum" often offer free plans, while secondhand books and libraries can be treasure troves of affordable plan resources.

Utilize Available Resources

Before purchasing new materials, investigate the possibility of using reclaimed wood or salvaged materials. Local lumberyards often have discounted or salvaged wood that can be repurposed for your project. Antique furniture stores or even demolition sites might provide valuable wood at a fraction of the cost.

Materials Selection and Procurement

Choosing the right materials is pivotal in building a budget-friendly dinghy. Here are some tips:

Select Affordable Woods

While exotic hardwoods like teak are desirable, they are expensive. Consider affordable and readily available softwoods like pine, cedar, or fir. These woods are suitable for dinghy construction, offering strength and durability at a lower cost.

Buy in Bulk

When possible, purchase wood in bulk to benefit from volume discounts. This approach often results in substantial savings, especially for larger planks or sheets of plywood.

Source Materials Online

Online marketplaces and lumber retailers frequently offer competitive pricing and bulk discounts. Compare prices from different sellers and utilize online coupon codes to maximize savings.

Construction Techniques and Tools

Strategic construction techniques and affordable tooling can significantly impact your budget. Follow these guidelines:

Embrace Traditional Techniques

Traditional boatbuilding techniques often require minimal specialized tools and can be performed with hand tools. Techniques like "stitch and glue" construction, using simple stitching with wire or twine, can be cost-effective alternatives to expensive adhesives.

Rent Specialized Tools

Rather than purchasing expensive power tools like planers, sanders, or jointers, consider renting them for short periods. This allows you to utilize specialized tools when needed without a substantial financial investment.

Borrow or Share Tools

Explore the possibility of borrowing or sharing tools with fellow boatbuilders or woodworking enthusiasts. This collaborative approach fosters a sense of community and minimizes individual expenses.

Finishing and Outfitting

Finishing and outfitting your dinghy can be done affordably with careful planning. Consider these aspects:

Use Budget-Friendly Finishes

Avoid expensive marine varnishes and opt for affordable alternatives like polyurethane or epoxy paints. These products provide good protection and durability at a lower cost.

Create Simple Oars

Oars can be handcrafted from readily available wood like oak or ash. Simple designs can be constructed with hand tools, minimizing the need for specialized equipment.

Reclaim or Repurpose Hardware

Look for secondhand hardware or repurpose existing items. Antique shops, nautical supply stores, or even online auctions can provide affordable hardware options.

Beyond the Boat

Building a wooden dinghy is not just about the boat itself; it's about the journey. Embrace these aspects to enhance your experience:

Utilize Free Resources

Numerous free online resources offer valuable information, plans, and tutorials on boatbuilding. Websites like "Boatbuilding Forum" and "WoodenBoat" provide a wealth of knowledge for aspiring boatbuilders.

Join Boatbuilding Communities

Connecting with other boatbuilders can provide valuable insights, tips, and support. Local boat clubs or online communities like "WoodenBoat Forum" offer a platform for sharing experiences and learning from others.

Enjoy the Process

Ultimately, the joy of building a wooden dinghy lies in the journey itself. Embrace the challenges, celebrate the small victories, and savor the satisfaction of crafting your vessel from scratch.

By applying these budget-friendly tips, you can embark on your wooden dinghy building adventure without breaking the bank. Remember, it's not just about the final product but the skills you learn and the memories you create along the way. Happy boatbuilding!

Tuesday, November 12, 2024

How to Choose the Right Wood for Your DIY Dinghy

How to Choose the Right Wood for Your DIY Dinghy

How to Choose the Right Wood for Your DIY Dinghy

Building a dinghy from scratch is a rewarding experience that allows you to connect with the traditional methods of boatbuilding. Choosing the right wood is crucial for a successful project, as it affects the boat's strength, durability, and even its aesthetic appeal. With so many options available, navigating the world of wood can feel overwhelming. Fear not, fellow boatbuilder! This guide will help you select the perfect wood for your dinghy.

Consider Your Needs and Goals

Before diving into wood selection, it's vital to clarify your goals for the dinghy. Ask yourself:

  • What type of sailing will you be doing? (Recreational, racing, or exploring)
  • What size and weight capacity do you need?
  • Do you want a traditional or modern look?
  • What's your budget?

The answers to these questions will narrow down your choices and guide you toward the most suitable wood for your project.

Understanding Wood Properties

Different woods possess unique characteristics that make them suitable for specific purposes. Here are some key factors to consider:

Strength and Durability

The strength and durability of wood are crucial for a dinghy's structural integrity. Look for woods with high tensile strength and resistance to rot and decay. Oak, cedar, and mahogany are excellent choices for their durability and resistance to water damage.

Weight and Buoyancy

The weight of the wood is essential for overall boat performance. Lighter woods, such as spruce and cedar, can help keep the dinghy lightweight and improve its buoyancy. Heavier woods, like oak and mahogany, may be more suitable for larger, more robust dinghies.

Workability and Finishing

The ease of working with wood is also important. Some woods are easier to cut, shape, and finish than others. Cedar and pine are known for their soft, workable grain, while oak and mahogany require more skill and experience. The chosen wood's finishing properties will determine how it will look and age over time.

Popular Wood Choices for Dinghies

Here's a closer look at some commonly used woods for dinghies:

Cedar

Cedar is a lightweight and durable wood with a beautiful natural scent. It's resistant to rot and insect damage, making it ideal for dinghies that will be exposed to the elements. Cedar is also relatively easy to work with and finishes beautifully.

Mahogany

Mahogany is a classic choice for boatbuilding, known for its strength, durability, and rich reddish-brown color. It's highly resistant to rot and decay, making it a long-lasting option for dinghies. Mahogany is also a beautiful wood that ages gracefully, developing a rich patina over time.

Oak

Oak is a strong and durable wood, often used for the keel, frames, and other structural components of a dinghy. It's resistant to water damage and can withstand heavy loads. Oak is heavier than cedar or mahogany, but its strength and durability make it a suitable choice for robust dinghies.

Spruce

Spruce is a lightweight and strong wood that is often used for planking and spars. It's known for its straight grain and good bending properties, making it suitable for building curved shapes. Spruce is also relatively inexpensive compared to other woods, making it a budget-friendly option.

Conclusion

Choosing the right wood for your DIY dinghy is a crucial step in the building process. By carefully considering your needs, understanding wood properties, and exploring different options, you can select the perfect wood for your project. Whether you choose a classic wood like mahogany or a more affordable option like spruce, the satisfaction of building your own dinghy from scratch will be well worth the effort.

How to Construct a Wooden Kayak for Speed and Performance

How to Construct a Wooden Kayak for Speed and Performance

Constructing a Wooden Kayak for Speed and Performance

Building a wooden kayak is a rewarding and challenging project that allows you to craft a vessel tailored to your specific needs and desires. While the process requires time, patience, and a good understanding of woodworking techniques, the result is a beautiful and durable kayak that offers exceptional performance. This article will guide you through the steps of constructing a wooden kayak, focusing on design elements that prioritize speed and performance.

Choosing the Right Design

The foundation of a fast and efficient kayak lies in its design. Select a plan that embodies the characteristics of a performance kayak, such as:

  • A slender hull shape: A narrow, streamlined hull reduces water resistance, allowing the kayak to glide through the water with minimal effort.
  • A pronounced rocker: Rocker refers to the curvature of the hull from bow to stern. A pronounced rocker aids in turning and maneuverability, particularly important for navigating tight spaces and making quick adjustments.
  • A moderate to high waterline: A higher waterline provides greater stability, making the kayak less likely to tip over, especially in rough waters.
  • A well-defined keel line: A prominent keel line contributes to directional stability and helps the kayak track straight.

Consider the following factors when selecting a plan:

  • Your intended use: Will you be paddling on calm lakes, swift rivers, or open ocean? This will determine the appropriate length, width, and rocker of the kayak.
  • Your skill level: If you're a beginner, a more stable design is advisable. As your skills improve, you can experiment with more advanced plans.
  • The materials you have access to: Different wood species have varying strengths, weights, and aesthetic qualities.

Selecting and Preparing Materials

The quality and preparation of your materials will significantly impact the durability and performance of your kayak. Choose strong, lightweight woods that are resistant to rot and water damage. Common choices include:

  • Cedar: Lightweight and aromatic, cedar is an excellent choice for the hull and deck of your kayak. It's naturally resistant to decay and insects.
  • Redwood: Known for its durability and strength, redwood is often used for structural elements like stringers and ribs.
  • Mahogany: This beautiful wood adds elegance and strength to your kayak. It's more expensive than other options, but its beauty and durability make it a worthwhile investment.
  • Okoume: A plywood option often used in boat building. Okoume is strong, lightweight, and offers excellent bending properties.

Before starting the construction process, carefully prepare your wood:

  • Mill the lumber to the required dimensions: Ensure the wood is cut to the precise sizes specified in your plan, allowing for a snug fit between the pieces.
  • Joint the edges: Use a jointer to create perfectly straight edges for the planks of your hull. This step helps to ensure a smooth and watertight seam.
  • Apply sealant: Apply a waterproof sealant to the wood before assembling the kayak. This will prevent water absorption and help protect the wood from rot.

Constructing the Hull

The hull forms the foundation of your kayak and is responsible for its shape, speed, and stability. Here's a general guide to building the hull:

1. Laying the Planks

The planking process involves joining planks of wood together to form the hull.

  • Use a strong adhesive: Apply a marine-grade epoxy adhesive to the edges of the planks to bond them together.
  • Clamp the planks in place: Use clamps to hold the planks securely against the mold while the adhesive dries.
  • Maintain a consistent spacing: Ensure the planks are evenly spaced to prevent gaps or overlaps. This will guarantee a smooth and watertight hull.

2. Adding Stringers and Ribs

Stringers and ribs provide structural support and define the shape of the hull.

  • Install stringers: Stringers run lengthwise along the hull and add strength. They are attached to the planks using screws and epoxy.
  • Position ribs: Ribs are curved pieces of wood that run across the width of the hull. They are attached to the stringers and planks to give the hull its shape.
  • Maintain consistent spacing: Follow the specifications of your plan for proper spacing and alignment of stringers and ribs.

3. Shaping and Fairing

Once the stringers and ribs are in place, you'll need to shape the hull and ensure a smooth, flowing surface.

  • Use a sander: Sand the exterior of the hull to remove any imperfections or unevenness.
  • Apply fairing compound: Use fairing compound to fill in any small gaps or inconsistencies. Smooth it with a putty knife for a seamless finish.
  • Repeat sanding and fairing as needed: Continue sanding and applying fairing compound until you achieve a smooth and uniform surface.

Building the Deck and Cockpit

The deck provides the top surface of the kayak and supports the seating and other features.

  • Create the deck framework: Use stringers and ribs to build a framework for the deck, similar to the hull construction process.
  • Apply planking: Install planks on top of the framework, similar to the hull planking.
  • Build the cockpit: The cockpit is the opening where the paddler sits. Use plywood or other suitable materials to construct the cockpit, ensuring it's properly sized for your comfort and convenience.
  • Attach the deck to the hull: Securely attach the deck to the hull using screws, epoxy, and appropriate fasteners.

Finishing Touches

After completing the primary construction, you'll need to apply the finishing touches to ensure a beautiful and durable kayak.

  • Sand the entire kayak: Thoroughly sand the entire surface of the kayak, smoothing out any imperfections.
  • Apply a varnish or paint: Use a marine-grade varnish or paint to protect the wood from water damage and enhance its aesthetic appeal. Apply several thin coats, allowing each coat to dry thoroughly before applying the next.
  • Install hardware: Attach the necessary hardware, such as the seat, footrests, hatches, and carrying handles. Ensure the hardware is secure and properly positioned.
  • Add optional features: Customize your kayak by adding features such as a rudder system, a spray skirt, or a fishing rod holder.

Important Considerations

Building a wooden kayak requires careful planning and attention to detail. Here are some additional considerations for achieving optimal performance:

  • Weight distribution: Distribute the weight of the kayak evenly to avoid excessive strain on any particular area. Use lightweight materials and avoid adding unnecessary weight.
  • Watertight integrity: Ensure the kayak is completely watertight by carefully sealing all seams and joints. Test the kayak for leaks before taking it on the water.
  • Proper paddling technique: Mastering proper paddling technique is essential for achieving maximum speed and efficiency. Take lessons or watch instructional videos to learn the correct movements and strokes.
  • Maintenance: Regularly inspect your kayak for any signs of damage or wear and tear. Maintain the varnish or paint to protect the wood from moisture.

Building a wooden kayak is a labor of love and a testament to your skill and dedication. By following the steps outlined in this article and paying attention to the key considerations, you can create a beautiful, fast, and efficient kayak that will provide countless hours of enjoyment on the water.

DIY Wooden Canoe Building: Choosing the Best Tools

DIY Wooden Canoe Building: Choosing the Best Tools

DIY Wooden Canoe Building: Choosing the Best Tools

So, you've decided to embark on the exciting journey of building your own wooden canoe! It's a fantastic project that promises a rewarding experience and a handcrafted masterpiece to enjoy for years to come. But before you dive into the world of planking, ribs, and epoxy, you need the right tools to make this adventure a success. Let's explore the essential tools for building your dream canoe and how to pick the best ones for your needs.

Essential Tools: The Foundation of Your Build

Think of these tools as the backbone of your canoe building operation. Without them, you'll be facing an uphill battle. Here's what you'll need:

Hand Tools:

  • Hand Plane: A well-maintained hand plane is your best friend for smoothing wood and shaping the canoe's hull. Choose one with a sharp blade and adjust it for the best performance.
  • Block Plane: Great for smaller tasks, like smoothing edges or shaping small curves. A block plane provides more control for delicate work.
  • Chisels: You'll need various sizes of chisels for carving, fitting, and fine-tuning the canoe's shape. Go for sharp chisels with sturdy handles.
  • Hammer: A claw hammer is essential for driving nails and removing them if needed. Use a hammer with a comfortable grip and a balanced weight.
  • Mallet: A mallet is gentler on wood than a hammer. It's perfect for driving wooden pegs or shaping wood without leaving marks.
  • Screwdrivers: A variety of screwdrivers (both flathead and Phillips head) are essential for working with fasteners.
  • Pliers: Pliers come in handy for gripping and bending metal, cutting wire, and holding small parts.
  • Tape Measure: Accuracy is crucial in canoe building, and a sturdy tape measure ensures your measurements are precise. Choose one with a clear marking system.
  • Level: A spirit level helps you keep things straight and even, especially when working with the canoe's frames and planking.

Power Tools:

  • Electric Drill: A cordless drill with a variety of drill bits is invaluable for drilling pilot holes for screws and fasteners. Opt for a drill with a good battery life and adjustable torque settings.
  • Jig Saw: A jig saw provides smooth and accurate cuts for shaping wood, especially when working with curves and complex shapes.
  • Belt Sander: A belt sander is a powerful tool for quickly smoothing large surfaces, especially when working with planking. Use it with caution and take care to avoid sanding too deeply.
  • Random Orbit Sander: This sander is perfect for fine-tuning and achieving a smooth, even finish on the canoe's hull and interior. Choose one with a dust collection system to keep your workspace clean.
  • Air Compressor (Optional): If you plan to use pneumatic tools, an air compressor is a worthwhile investment. Air-powered tools can offer speed and power for specific tasks.

Essential Equipment:

  • Workbenches: You'll need at least one sturdy workbench to support your canoe's construction. A dedicated workbench provides a stable platform for your tools and materials.
  • Clamps: Clamps are indispensable for holding wood together securely during assembly and gluing. Invest in a variety of sizes and types, including bar clamps, C-clamps, and spring clamps.
  • Sawhorses: Sawhorses provide stable support for planks and other large pieces of wood. Look for sawhorses with adjustable heights for versatility.
  • Plank Support Frames: These frames are designed specifically to support the planks of your canoe while you work on them. They help maintain the shape of the canoe's hull during construction.
  • Safety Gear: Safety comes first! Eye protection, ear protection, dust masks, and work gloves are essential for protecting yourself from hazards during your build.

Choosing the Right Tools for Your Needs

Not every canoe builder needs the same tools. Consider these factors when selecting your equipment:

  • Your Budget: Tools can range in price from affordable hand tools to more expensive power tools. Set a budget and prioritize the tools you absolutely need.
  • Your Skill Level: If you're new to woodworking, starting with basic hand tools and gradually adding power tools as you gain experience is a good approach.
  • The Type of Canoe: The size, complexity, and material of your canoe will influence the tools you need. For example, a smaller, cedar-strip canoe might require fewer power tools than a larger, plywood canoe.
  • Your Space: Consider the space you have available for your workspace. Choose tools that fit comfortably and allow you to move around freely.

Investing in Quality

It's tempting to go for the cheapest tools, but in the long run, investing in quality tools can save you time, frustration, and money. Here's why:

  • Durability: High-quality tools are built to last, withstand wear and tear, and provide reliable performance for years to come.
  • Performance: Well-made tools deliver precise results, making your work easier and more enjoyable. Sharp blades, balanced handles, and smooth mechanisms make a big difference.
  • Safety: Quality tools are designed with safety in mind, reducing the risk of accidents and injuries.

Learning to Use Your Tools

Even with the best tools, you need to know how to use them properly. Here are some tips:

  • Read the Manuals: Familiarize yourself with the instructions and safety guidelines for each tool.
  • Practice: Practice using each tool on scrap wood before working on your canoe.
  • Sharpen Your Tools: Keep your hand tools sharp for the best results and safety. Invest in a good sharpening system.
  • Take Your Time: Don't rush your work. Slow and steady wins the race, especially when building a canoe.

Beyond the Essentials

As you gain experience, you may want to explore additional tools that can enhance your canoe building experience:

  • Router: A router is helpful for shaping edges, creating decorative details, and routing grooves.
  • Table Saw: A table saw offers precise and accurate cuts for planking and other large pieces of wood.
  • Band Saw: A band saw is perfect for making intricate curves and cuts, especially when working with ribs and stems.
  • Pneumatic Nailer: An air-powered nailer can speed up the process of attaching planking and other elements.
  • Sanding Block: Use sanding blocks to apply pressure evenly when sanding, resulting in a smooth and consistent finish.

Building a wooden canoe is a labor of love, and having the right tools is crucial for a successful and enjoyable project. Start with the essential tools, invest in quality, and learn how to use them properly. Your canoe will be a testament to your dedication, skill, and the joy of creating something beautiful with your own hands. Happy canoe building!

Wooden Kayak Building for Beginners: Tips and Techniques

Wooden Kayak Building for Beginners: Tips and Techniques

Wooden Kayak Building for Beginners: Tips and Techniques

Building a wooden kayak can be a rewarding and fulfilling experience. It's a journey of craftsmanship, creativity, and connection with nature. While it might seem daunting, with the right guidance and a bit of patience, you can build a beautiful and functional kayak. This article will provide you with essential tips and techniques to help you navigate this exciting project.

Choosing the Right Wood

Selecting the right wood is crucial for building a sturdy and durable kayak. Traditional kayak building often uses cedar, spruce, or mahogany for their lightweight and strength. Cedar is known for its resistance to rot, while spruce offers a good balance of strength and flexibility. Mahogany, with its beautiful grain, adds a touch of elegance to the finished product.

Evaluating Wood Quality

Before you start cutting, carefully examine your wood for any defects, knots, or cracks. These can weaken the structure of your kayak. Look for straight grain and avoid wood with significant variations in color or texture.

Essential Tools and Materials

You'll need a variety of tools and materials to embark on your kayak-building journey. Here is a basic list:

  • Planing tools (hand plane, block plane)
  • Saw (hand saw, circular saw)
  • Chisels and mallet
  • Measuring tape and ruler
  • Sandpaper (various grits)
  • Epoxy resin and hardener
  • Fiberglass cloth
  • Paint or varnish
  • Clamps and weights
  • Safety gear (gloves, eye protection, respirator)

This list is a starting point; additional tools may be required based on your chosen building method and design. Research different building methods to determine what tools are necessary.

Step-by-Step Building Process

Building a wooden kayak involves a series of steps that require precision and patience. Here's a general overview of the process:

1. Planning and Design

Start by selecting a kayak design that suits your needs and skill level. You can find free plans online or purchase professional blueprints. Study the plans carefully and familiarize yourself with the various components of the kayak. Decide on the overall dimensions, shape, and features that you desire.

2. Preparing the Lumber

Once you have your plans, accurately cut the lumber to the required dimensions. Use your hand plane to create smooth surfaces and ensure that all pieces are properly shaped. Remember to account for the thickness of the wood when measuring and cutting. This is a crucial step for ensuring a successful build.

3. Creating the Framework

Constructing the frame involves assembling the ribs, keel, and stem, creating the basic shape of your kayak. Use woodworking joints like mortise and tenon or lap joints to join the pieces securely. Carefully align and clamp the framework together before permanently attaching the pieces. Make sure that the frame is sturdy and accurately reflects the design plans.

4. Planking the Hull

Attaching the planking to the frame is a rewarding step where you begin to see your kayak take shape. Use marine-grade epoxy to bond the planking to the frame, ensuring a strong and watertight seal. Carefully position each plank, making sure the seams are tight and the joints are properly aligned. Use clamps and weights to keep the planks in place during the drying process.

5. Finishing and Refinement

After the epoxy has cured, carefully sand the entire hull to create a smooth and even surface. Apply a layer of fiberglass cloth to further strengthen the hull. When the fiberglass has dried, you can choose to paint or varnish the kayak to protect the wood and create a beautiful finish.

6. Adding the Deck and Cockpit

Construct the deck and cockpit according to your design plans. This involves adding the deck beams, stringers, and supports. Make sure the deck is securely attached to the hull and that the cockpit opening is well-formed and comfortable. You might also add hatches, bulkheads, and other deck features at this stage.

7. Refinement and Sealing

After the deck is in place, give the kayak a final sanding and make any necessary adjustments to ensure smooth transitions between the hull and deck. Apply a final layer of epoxy or varnish to seal the kayak and protect it from the elements. This also helps to create a smooth and water-resistant finish.

Essential Tips and Techniques

Building a wooden kayak can be a challenging but rewarding endeavor. Here are some valuable tips and techniques to help you along the way:

  • Measure twice, cut once. Accuracy is paramount in woodworking. Double-check your measurements before making cuts to avoid mistakes that can be difficult to fix. Take your time and be patient.
  • Use quality tools and materials. Invest in good-quality tools and materials that are specifically designed for woodworking. This will make your building process easier and ensure a durable and long-lasting kayak.
  • Learn from experienced builders. Connect with experienced kayak builders or join online forums where you can learn from their expertise. They can offer valuable insights and guidance.
  • Don't be afraid to ask for help. If you encounter a problem, don't hesitate to ask for help from a mentor or fellow builder. There's no shame in seeking guidance.
  • Embrace the learning process. Building a wooden kayak is a journey of discovery and learning. Enjoy the process and celebrate your progress, even the small victories.
  • Take your time. Building a kayak is a labor of love and requires patience. Don't rush the process. Take your time to ensure high-quality workmanship and enjoy the journey.
  • Have fun! Remember that building a kayak is a hobby and a chance to be creative. Enjoy the experience and the satisfaction of creating something beautiful and functional with your own hands.

Conclusion

Building a wooden kayak is an adventure in itself. It's a journey that combines skill, patience, and a love for the water. By following these tips and techniques, you can build a beautiful and functional kayak that you can enjoy for years to come. Embrace the process, learn from your mistakes, and savor the satisfaction of creating something unique and special with your own hands.

How to Design a Wooden Canoe for Optimal Balance

How to Design a Wooden Canoe for Optimal Balance

Crafting a Canoe for Stability: Balancing Beauty and Functionality

Building a canoe is a labor of love, a testament to human ingenuity and craftsmanship. But beyond the aesthetic appeal lies a crucial aspect â€" **balance**. A well-designed canoe should glide effortlessly through the water, responding gracefully to your paddle strokes, without the threat of tipping over.

The Science of Canoe Balance

Think of a canoe like a seesaw. The fulcrum, the pivot point, is the center of gravity. This point represents the average location of the canoe's mass. A canoe is considered balanced when its center of gravity is located directly above the center of buoyancy, the point where the hull displaces the most water.

Factors Influencing Canoe Balance

Several factors play a role in determining a canoe's balance. These include:
  • Hull Shape: The wider the hull, the lower the center of gravity. Think of a wide, flat-bottomed canoe â€" it has a lower center of gravity and tends to be more stable. Conversely, a narrow, pointed hull has a higher center of gravity, making it faster but less stable.
  • Weight Distribution: The distribution of weight within the canoe significantly impacts its balance. A canoe loaded heavily in the bow or stern will be less stable than one with the weight evenly distributed.
  • Load Capacity: The maximum weight a canoe can safely carry also influences its balance. A canoe with a higher load capacity often needs to be wider and have a lower center of gravity to maintain stability.
  • Water Conditions: Calm waters allow for less stable canoes, but rough waters require a canoe with a lower center of gravity and a wider hull to prevent capsizing.

Design Principles for Optimal Balance

1. Choose the Right Hull Shape

Selecting the appropriate hull shape is crucial for achieving the desired balance. Consider the intended use of the canoe:
  • For recreational paddling and fishing: A wider, flatter hull offers increased stability for leisurely trips. This is particularly important if you'll be fishing or carrying heavy gear.
  • For racing or touring: A narrower, V-shaped hull is preferred for speed and efficiency. However, this comes at the expense of stability, so it's essential to have good paddling skills and a balanced load.
  • For whitewater: A wide, flat-bottomed hull with a high rocker (curved keel) provides maneuverability and stability in turbulent conditions.

2. Achieve Even Weight Distribution

Load your canoe evenly to maintain balance. Avoid concentrating weight in the bow or stern. Here are some tips:
  • Pack gear symmetrically: Place heavier items in the center of the canoe and lighter items towards the ends.
  • Consider the position of passengers: If you have passengers, position them evenly on both sides of the center line of the canoe.
  • Use a thwart system: Thwarts (crosspieces) act as load supports and can help evenly distribute weight across the length of the canoe.

3. Account for Load Capacity

Ensure your canoe's load capacity is sufficient for the intended weight. This information is usually provided by the manufacturer. Overloading a canoe can lead to instability and potential capsizing.

4. Experiment with Trim

The "trim" of a canoe refers to its tendency to sit higher or lower in the water at either end. Adjust the trim by shifting the weight of the canoe.
  • Bow-heavy trim: This makes the canoe more stable in calm water but may cause it to "nose dive" in waves or chop.
  • Stern-heavy trim: This can increase speed but can also make the canoe less stable.
  • Neutral trim: The ideal trim, with the canoe sitting level in the water.

Improving Balance Through Canoe Construction Techniques

1. Optimize Hull Shape

* **Full Length Rocker:** This refers to the curvature of the keel from bow to stern. A greater rocker makes the canoe more maneuverable in tight spaces and provides additional stability in rough water. * **Flare:** The widening of the canoe's sides as they rise from the waterline. Flare increases stability by providing buoyancy and resistance to tipping. * **Chine:** A sharp angle in the hull where the bottom and sides meet. Chines can increase buoyancy and reduce drag. * **Transom:** The flat vertical section at the stern of the canoe. A wider transom provides more stability and helps to prevent the canoe from "squatting" under load.

2. Choose Appropriate Materials

* **Wood:** Wood is a traditional material for canoe construction, known for its durability, strength, and beautiful aesthetic. Different wood species offer unique properties, so choose the right one for your needs. * **Canvas:** Canvas is often used for covering wooden canoes. It adds strength and water resistance, but it needs to be treated regularly. * **Fiberglass:** Fiberglass can be used to reinforce wooden canoes and provide additional protection. It's also a good option for lighter canoes.

3. Consider the Weight of the Canoe

A lighter canoe is easier to carry and maneuver, which can improve balance. However, lighter canoes may be more prone to wind gusts and waves.

Learning to Paddle for Stability

While a well-designed canoe provides a solid foundation for balance, mastering paddling techniques is crucial.
  • Maintain a Balanced Posture: Keep your weight centered in the canoe, avoiding leaning too far to one side.
  • Use Proper Paddle Strokes: Learn the various paddle strokes to maintain balance and control. Efficient strokes keep the canoe moving smoothly and prevent sudden shifts in weight.
  • Anticipate and Adjust: Be aware of your surroundings and make adjustments to your paddling technique to compensate for waves, wind, or shifting weight.

Practice Makes Perfect

The best way to learn about a canoe's balance is to get out on the water. Practice different paddling strokes and loading scenarios to become familiar with how the canoe responds. Remember, safety should always be a priority. Wear a personal flotation device (PFD) and stay within your comfort zone.

Conclusion: Finding Harmony Between Balance and Beauty

Designing a wooden canoe for optimal balance is an intricate process that involves careful considerations of hull shape, weight distribution, load capacity, and construction techniques. By understanding these principles and applying them thoughtfully, you can create a canoe that is not only beautiful but also stable and reliable, allowing you to enjoy the tranquility of paddling on the water with confidence and ease.

Monday, November 11, 2024

How to Build a Boat: Tips for Creating Your Own Vessel

How to Build a Boat: Tips for Creating Your Own Vessel

How to Build a Boat: Tips for Creating Your Own Vessel

Building your own boat can be a rewarding and challenging project. It requires dedication, patience, and a good understanding of boat construction techniques. Whether you're a seasoned woodworker or a novice DIY enthusiast, this comprehensive guide will provide you with valuable tips and insights to help you embark on your boatbuilding journey.

1. Planning and Design

The foundation of any successful boatbuilding project lies in meticulous planning and design. Before you even begin to gather materials, take the time to consider the following:

1.1 Determine Your Needs and Goals

Start by defining the purpose and intended use of your boat. Consider factors like:

  • Type of boat: Rowboat, sailboat, motorboat, kayak, etc.
  • Size: Length, beam, and draft.
  • Capacity: Number of passengers and cargo weight.
  • Speed and performance: Desired speed and handling characteristics.
  • Budget: Material costs, tools, and labor.

1.2 Choose a Design

Once you have a clear idea of your requirements, you can start researching boat designs. You can find plans online, in books, or from reputable boat design firms. Consider these factors when selecting a design:

  • Experience level: Choose a design that matches your skill level.
  • Availability of materials: Ensure that the materials required for the design are readily available.
  • Construction methods: Select a design that uses construction techniques you are comfortable with.

1.3 Gather Resources

Before you start building, make sure you have all the necessary resources:

  • Plans: Obtain detailed construction plans from the designer or a reputable source.
  • Materials: Wood, plywood, fiberglass, epoxy, etc.
  • Tools: Hand tools, power tools, and specialized boatbuilding equipment.
  • Work space: A large, well-ventilated area is essential for boatbuilding.
  • Safety gear: Eye protection, ear protection, gloves, and respirators.

2. Construction Techniques

Boatbuilding employs a variety of construction techniques, each with its own advantages and disadvantages. Here are some common methods:

2.1 Plank-on-Frame Construction

This traditional method involves building a frame of ribs and stringers and then attaching planks to the frame. It is a time-consuming but durable method.

2.2 Strip Planking

This technique uses thin strips of wood that are glued and fastened to the frame, creating a smooth, watertight hull. It offers excellent strength and flexibility.

2.3 Plywood Construction

Using plywood sheets, this method is relatively quick and easy, suitable for smaller boats. Plywood can be shaped and joined to form the hull.

2.4 Fiberglass Construction

This modern method involves applying layers of fiberglass cloth and resin over a mold or frame. It produces strong, lightweight hulls, but requires specialized equipment and knowledge.

3. Building the Hull

Building the hull is the most critical stage of boat construction. Follow these steps:

3.1 Laying the Keel

The keel is the backbone of the boat and provides structural support. It is usually made of wood or steel and is laid down first on the building jig.

3.2 Building the Frames

The frames provide the shape of the hull. They are made of wood, steel, or aluminum and are attached to the keel at predetermined intervals.

3.3 Planking the Hull

Planks are attached to the frames to create the hull. They are typically made of wood or fiberglass and are joined together using various methods.

3.4 Fiberglassing the Hull (If applicable)

For fiberglass construction, layers of fiberglass cloth and resin are applied over the hull to create a strong and watertight finish.

4. Finishing Touches

Once the hull is built, it's time to add the finishing touches:

4.1 Deck and Superstructure

The deck provides walking space and protects the interior. It is usually made of wood, plywood, or fiberglass.

4.2 Cabin and Interior

If the design calls for a cabin or interior spaces, they are built and fitted to the hull.

4.3 Paint and Varnish

Applying paint or varnish protects the hull and provides a decorative finish.

4.4 Hardware and Equipment

Install hardware such as rudders, keels, masts, and other essential equipment.

5. Launching and Testing

After the boat is complete, it's time to launch it and test its performance:

5.1 Launching

Carefully launch the boat into the water, ensuring it is properly secured and balanced.

5.2 Testing and Adjustments

Test the boat's performance and make any necessary adjustments to ensure its seaworthiness and stability.

6. Maintenance and Care

To extend the life of your boat, it's essential to provide proper maintenance and care:

6.1 Cleaning and Washing

Regularly wash and clean the hull, deck, and interior to remove dirt and debris.

6.2 Hull Inspection and Repairs

Inspect the hull for any signs of damage and repair them promptly.

6.3 Storage and Winterization

Store the boat properly during the off-season, taking steps to protect it from the elements and prevent damage.

Conclusion

Building your own boat can be a rewarding and challenging experience. With meticulous planning, careful construction, and proper maintenance, you can create a vessel that you can enjoy for years to come. Remember to prioritize safety, learn from experienced boatbuilders, and embrace the process of learning and discovery. Happy boatbuilding!

How to Design a Wooden Kayak for Performance and Stability

How to Design a Wooden Kayak for Performance and Stability

Designing a Wooden Kayak for Performance and Stability

Crafting a wooden kayak is an art form that combines traditional techniques with modern design principles. Beyond aesthetics, the true success of a wooden kayak lies in its performance and stability on the water. This article will guide you through the key design considerations that contribute to a truly exceptional wooden kayak.

Understanding the Fundamentals of Kayak Design

The core of kayak design rests on balancing three key elements: stability, speed, and maneuverability.

Stability

Stability is the kayak's ability to resist tipping. This is achieved through a wide beam, a high center of gravity, and a large waterline area. Wide beams provide a wider base, while a higher center of gravity allows the kayak to self-right more easily. A larger waterline area, the area where the hull meets the water, adds stability by increasing the surface area resisting tipping.

Speed

Speed is driven by the kayak's hydrodynamic shape, or how efficiently it moves through the water. A long, narrow hull with a sharp bow and stern minimizes resistance, allowing for smooth and fast paddling.

Maneuverability

Maneuverability refers to how easily the kayak turns and responds to your paddling strokes. This is influenced by the hull's shape and rocker (the curvature of the keel). A more rounded hull and pronounced rocker allow for tighter turns, while a straighter hull with less rocker promotes a more stable and direct path.

Choosing the Right Wood for Your Kayak

The choice of wood significantly impacts the kayak's weight, durability, and aesthetic appeal.

  • Cedar is a lightweight and aromatic wood that offers good strength-to-weight ratio and natural resistance to rot. It’s often used for traditional-style kayaks.
  • Oak is a heavy but extremely durable wood, excellent for high-performance kayaks. Oak’s strength makes it ideal for handling harsh conditions.
  • Pine offers a good balance of strength and affordability. Its lightweight nature is beneficial for touring kayaks, and its natural beauty is appealing for aesthetic purposes.
  • Mahogany, known for its rich color and strength, is prized for its resistance to moisture and insect damage. It’s a popular choice for building sleek and durable kayaks.

Designing for Performance: Key Considerations

Here are some crucial design elements that directly impact performance and stability:

Hull Shape

The hull shape is fundamental. For a fast, stable kayak, consider a long, narrow hull with a gentle rocker. This design will cut through the water efficiently. For added maneuverability, opt for a more rounded hull with a pronounced rocker. A combination of these features offers a balance of speed and maneuverability.

Beam Width

A wider beam promotes stability, especially for solo paddlers or for carrying gear. A narrower beam, however, is better for speed.

Keel Design

The keel's design plays a crucial role. A deep keel with a straight line offers better tracking and stability. A shallow, rounded keel is better for maneuverability. Experiment with these options based on your desired performance.

Deck and Cockpit Design

The deck and cockpit design contribute to comfort and ease of paddling. A spacious cockpit allows for easy entry and exit and plenty of legroom. A low deck provides a stable platform for paddling and contributes to greater hull speed. A high deck increases stability but can negatively impact speed and maneuverability.

Building Your Wooden Kayak

Once you’ve finalized your design, the construction process begins. This involves:

  • Creating a Frame: A strong and sturdy frame is essential for supporting the kayak's structure. Use strong, durable wood like oak or cedar for this purpose.
  • Planking the Hull: Planks of wood are meticulously fitted and attached to the frame to create the kayak's hull. Use a wood sealant to protect against moisture and rot.
  • Adding Deck and Cockpit: The deck and cockpit are built using lightweight plywood or similar materials. Ensure a smooth and watertight fit.
  • Finishing and Sealing: The final step involves finishing and sealing the kayak. This includes sanding, varnishing, and adding any additional protective coatings.

Enjoying Your Wooden Kayak

With meticulous design and careful construction, your wooden kayak will provide years of enjoyment on the water. It will be a testament to your craftsmanship and a source of pride. Remember to regularly maintain your kayak and ensure that the wood is properly sealed to prevent damage and extend its lifespan.

How to Build a Dinghy: A Complete Guide to Design and Construction

How to Build a Dinghy: A Complete Guide to Design and Construction

Building Your Own Dinghy: A Complete Guide to Design and Construction

Hey there, fellow boat enthusiast! Ever dreamed of sailing your own creation across the water? Building a dinghy is a rewarding journey that blends creativity, craftsmanship, and the thrill of adventure. It's not as daunting as it might seem, and this guide will walk you through every step, from design to launch day.

Choosing Your Dinghy Design

The first step is picking the perfect design. There are countless options out there, so let's break it down:

Types of Dinghies

There are many different types of dinghies, each with their own pros and cons:

  • Sailing Dinghies: Ideal for small races and exploring, these boats rely on wind power for propulsion.
  • Rowing Dinghies: Perfect for calm waters and fishing, these are propelled by oars.
  • Motor Dinghies: A blend of both, they combine oars with an outboard motor for added flexibility.
  • Inflatable Dinghies: Highly portable and compact, they are great for storage and transport.

Dinghy Size and Shape

The size and shape of your dinghy will depend on your intended use:

  • Small Dinghies: Best for solo use or short trips, they are lightweight and maneuverable.
  • Medium Dinghies: Offer a good balance of size and stability, suitable for family outings and leisurely cruises.
  • Large Dinghies: Great for carrying cargo or a larger crew, they are sturdy and seaworthy.

Consider the following factors:

  • Number of people you plan to carry
  • Type of waters you will be sailing in
  • Your level of experience with boatbuilding

Designing Your Dinghy: Plans and Software

Once you have a general idea of your dinghy, it's time to get specific with the design. You have two primary options:

Using Existing Plans

Plenty of dinghy plans are available online and from boatbuilding resources. This is a great option for beginners, as it provides detailed blueprints and instructions. You can even find free dinghy plans online, but those might be limited in quality and completeness.

Designing from Scratch

For those with a bit more confidence, designing from scratch is a rewarding experience. You can tailor the design to your exact needs and preferences. There are several software programs available that allow you to design your dinghy digitally, such as:

  • FreeCAD: A powerful open-source CAD program, it's a good option for beginners.
  • Rhino 3D: A more advanced program, it offers sophisticated modeling capabilities.
  • SolidWorks: A professional-grade program often used in industries like aerospace and automotive.

If you're going the DIY route, consider getting a mentor or joining a boatbuilding forum for guidance.

Gathering Materials and Tools

With your design finalized, you'll need to gather the necessary materials and tools:

Materials

The primary materials for a dinghy are:

  • Plywood: Often marine-grade plywood, it provides a sturdy yet lightweight hull.
  • Epoxy Resin and Hardener: Forms a strong bond between layers of plywood and protects the wood from moisture.
  • Fiberglass Cloth: Reinforces the hull and adds strength.
  • Wood Filler: Used to fill gaps and imperfections in the wood.
  • Paint or Varnish: Protects the wood from the elements and adds a final finish.
  • Hardware: Includes fittings like cleats, blocks, hinges, and other components necessary for the boat's functionality.

Depending on your design, you might also need:

  • Spars (mast, boom, and rudder): For sailing dinghies
  • Oars: For rowing dinghies
  • Outboard Motor: For motor dinghies

Tools

The tools you'll need will vary depending on your design and experience, but a basic list includes:

  • Jigsaw or Bandsaw: For cutting plywood to shape.
  • Power Drill: For drilling holes and attaching hardware.
  • Sandpaper: For smoothing surfaces and preparing them for painting or varnishing.
  • Clamps: For holding pieces of wood together while gluing and during construction.
  • Paint Brushes and Rollers: For applying paint or varnish.
  • Safety Gear: Including gloves, a respirator mask, and eye protection, is essential for working with epoxy and fiberglass.

Construction Process

Now comes the exciting part â€" building your dinghy! The specific steps will depend on your design, but here's a general overview:

Building the Hull

This is the foundation of your dinghy. You'll likely be using plywood, which is cut to shape and joined together to form the hull's panels. Depending on the design, you might use a combination of plywood and other materials like fiberglass for additional strength and durability. Once the hull panels are cut and assembled, you'll need to secure them with epoxy resin and fiberglass cloth, which will create a watertight, durable structure.

Building the Deck

The deck adds a solid top to your dinghy. The deck is often built separately from the hull and then attached. It can be built using similar materials like plywood and epoxy resin, and it's often reinforced with fiberglass cloth for extra strength.

Adding the Keel and Transom

The keel runs along the bottom of the hull and provides stability and direction. The transom is the back of the hull, where the rudder and motor mount. You'll attach the keel and transom to the hull using epoxy resin and fiberglass cloth.

Adding Internal Structures and Fittings

You'll need to build internal structures for support, such as stringers and bulkheads. These structures help strengthen the hull and divide it into compartments. You'll also install hardware fittings like cleats, blocks, hinges, and oar locks at this stage, depending on your dinghy's design.

Finishing Touches

Once the primary structure is complete, it's time to add finishing touches like painting, varnishing, and installing any remaining hardware. This is where you can truly personalize your dinghy with your favorite colors and designs.

Launching Your Dinghy

After all the hard work, it's time to launch your dinghy! Remember to test the boat thoroughly in calm waters before venturing out further. It's a good idea to have a buddy along for safety. Once you're happy with the performance, you can enjoy your very own custom-made dinghy.

Tips for Success

Here are a few tips to ensure your boatbuilding experience is as smooth as possible:

  • Plan Ahead: Before you start building, have a clear plan of your design, materials, and tools.
  • Take Your Time: Don't rush the process. Boatbuilding is about precision and attention to detail, so take your time and enjoy the journey.
  • Learn from Others: Join a boatbuilding forum or find a mentor who can provide guidance and support.
  • Safety First: Always prioritize safety, wear appropriate protective gear, and work in a well-ventilated area.
  • Be Patient: Building a dinghy takes time and effort, so be patient and persevere through any challenges.

Enjoy the Journey!

Building a dinghy is a challenging but deeply rewarding experience. You'll learn valuable skills, create something beautiful, and have a vessel to explore the waterways. Remember to embrace the process, celebrate your accomplishments, and enjoy the journey of building your own dinghy! Happy sailing!

How to Build a Kayak from Scratch: Step-by-Step Instructions

How to Build a Kayak from Scratch: Step-by-Step Instructions

Building Your Own Kayak: A Step-by-Step Guide

Hey there, fellow paddlers! So you're thinking about building your own kayak, huh? It might sound daunting, but trust me, it's a super rewarding experience. You'll be able to design a kayak that fits you perfectly, and you'll have the satisfaction of knowing you built it with your own two hands. This guide will walk you through the entire process, step by step. We'll cover everything from choosing the right materials and designing your kayak to finishing the hull and outfitting it. Ready to dive in? Let's get started!

Step 1: Choosing Your Design and Materials

Choosing a Design

First things first, you need to decide what kind of kayak you want to build. Do you want a sleek, fast racing kayak? A stable, wide recreational kayak? Or maybe a nimble, maneuverable whitewater kayak? There are tons of free plans available online, and many kayak building books have plans included.

When choosing a design, consider these factors:

  • Length and width: Longer kayaks are faster but less maneuverable. Wider kayaks are more stable but slower.
  • Hull shape: A rounded hull is more stable, while a pointed hull is faster.
  • Seat position: The position of the seat affects the kayak's trim and handling.
  • Cockpit size and shape: Choose a cockpit that fits you comfortably and provides good access for getting in and out.

You can also find inspiration from existing kayaks. If you see a kayak you like, consider its dimensions and features, and think about how you might modify them for your own design.

Choosing Materials

The most common materials for building a kayak are:

  • Fiberglass/Epoxy: This is a strong, durable, and relatively lightweight material. It's a popular choice for beginners because it's easy to work with.
  • Kevlar/Epoxy: Kevlar is even stronger than fiberglass, making it ideal for kayaks that will see a lot of abuse. It's also lighter than fiberglass, which can improve performance.
  • Wood: Wooden kayaks are beautiful and traditional. They are also very strong, but they require more skill and experience to build.
  • Strip Planking: This technique uses thin strips of wood to create a strong and lightweight hull.
  • Polyethylene: Polyethylene is a durable and affordable material. It's easy to mold and repair, making it a great option for beginners. It's commonly used for recreational kayaks.

Choosing the right material depends on your budget, your skill level, and the intended use of your kayak. If you're a beginner, fiberglass/epoxy is a great starting point. But if you're looking for a lightweight, durable kayak, consider Kevlar or a strip planking design.

Step 2: Building the Framework

Once you've chosen your design and materials, you're ready to start building the framework of your kayak. This step involves creating the basic shape of the hull. You can use different methods to achieve this.

Using a Traditional Framework

For this method, you'll use wooden ribs and stringers to form the shape of the kayak. These ribs are curved pieces of wood that run lengthwise along the kayak and connect to the stringers, which run perpendicular to the ribs. The ribs and stringers are then covered with plywood, fiberglass, or other materials. This method is considered the traditional way of building a kayak.

Using Foam Core

This method uses pre-shaped foam blocks for the main structure. These foam blocks are cut and shaped to create the desired hull shape. They are covered with fiberglass and epoxy for a durable hull. This method is faster than traditional framing and can be more economical.

Using a Strip Planking Method

This technique uses long, thin strips of wood that are glued together and bent to form the hull. The strips are overlapped and carefully glued together, creating a durable and lightweight hull. This is a more advanced method that takes time and precision, but it results in a beautiful and unique kayak.

Step 3: Covering the Hull

Once the framework is in place, you'll need to cover it with the chosen material to create a watertight hull. This process can vary depending on the material you've chosen.

Fiberglass/Epoxy

For this process, you'll first apply a layer of resin to the framework, then lay down fiberglass cloth. You'll then apply another layer of resin on top. This process is repeated several times, creating a strong, durable, and waterproof hull.

Kevlar/Epoxy

The process of covering the framework with Kevlar is similar to using fiberglass. You'll apply epoxy resin and layers of Kevlar fabric. You'll then sand the hull for a smooth finish and apply more layers of epoxy for durability.

Polyethylene

If you're using polyethylene, the process is much simpler. This material is already molded to form a kayak hull. You might need to add some extra reinforcement, such as fiberglass, around the cockpit area.

Step 4: Finishing and Outfitting

The final step is to finish your kayak and add the necessary outfitting. This includes painting or varnishing the hull, adding the deck, hatch, seat, footrests, and any other accessories.

Finishing the Hull

You can paint your kayak with any color you like. You'll want to use a marine-grade paint that's designed to withstand the elements. You can also varnish your kayak if you're using wood.

Adding Outfitting

Outfit your kayak with the essential components. This includes:

  • Deck: The deck is the top part of the kayak. It's usually made of fiberglass or wood. You'll need to add a deck hatch for access to the storage compartment.
  • Seat: The seat is the most important part of the kayak. It should be comfortable and provide good support.
  • Footrests: Footrests help you maintain good posture and balance.
  • Bulkheads: These are watertight compartments that separate the hull into sections. They prevent the kayak from sinking if it takes on water.
  • Hatches: Hatches provide access to the storage compartments.
  • Thwart: This is a support beam that runs across the cockpit. It provides a place to rest your feet or store gear.
  • Paddle Leash: Attach a paddle leash to your paddle to prevent it from floating away.

You can add other accessories as needed. For example, you might want to add a rudder, a spray skirt, a compass, a fish finder, or a GPS device.

Step 5: Launching and Enjoying Your New Kayak

After all that hard work, you're ready to launch your new kayak! Take your time and get used to it before venturing out into open water. Practice your paddling skills, try different strokes, and most importantly, have fun!

Remember, building a kayak is a journey, not a race. It takes time, patience, and dedication. But the satisfaction of paddling your own handcrafted creation is truly unmatched.

Happy paddling!

How to Construct a Pontoon Boat Using Simple Materials

How to Construct a Pontoon Boat Using Simple Materials

Constructing a Pontoon Boat Using Simple Materials

Building a pontoon boat can be a rewarding and enjoyable project, allowing you to enjoy the waters in a unique and personalized vessel. While commercially manufactured pontoon boats are readily available, constructing your own using readily accessible materials offers a sense of accomplishment and customization. This guide will provide a comprehensive overview of the process, focusing on using simple and readily available materials for a DIY pontoon boat.

Choosing the Right Materials

The foundation of a pontoon boat lies in its pontoons, the buoyant structures that support the deck. While specialized pontoon kits exist, constructing them from readily available materials can be an economical and adaptable approach.

Pontoon Construction Materials

  • PVC Pipes: PVC pipes are a popular choice for pontoons due to their affordability, durability, and ease of handling. They are buoyant, resistant to corrosion, and readily available in various diameters. Consider using larger diameter pipes (8 inches or more) for increased buoyancy and stability.
  • Wooden Planks: Wooden planks provide the structural integrity for the pontoons. Consider using pressure-treated lumber for its resistance to water damage and rot. Select planks with sufficient thickness to support the weight of the boat and its occupants.
  • Marine Plywood: Marine plywood, specifically designed for marine applications, offers superior water resistance and durability compared to standard plywood. Its use is recommended for the deck construction for longevity and stability.
  • Fasteners: Choose corrosion-resistant fasteners, such as stainless steel screws and bolts, for all parts of the pontoon boat construction.

Pontoon Construction

The construction of the pontoons forms the cornerstone of the project. The steps outlined below provide a comprehensive guide for building pontoons using PVC pipes and wooden planks.

Step 1: Cutting and Joining PVC Pipes

  1. Determine the desired length of each pontoon and cut the PVC pipes accordingly. Ensure all pipes are the same length for consistent buoyancy.
  2. Use PVC cement to join the ends of the PVC pipes together, creating a seamless tube. Allow the cement to dry completely before proceeding to the next step.

Step 2: Building the Pontoon Frames

  1. Cut wooden planks to the desired length of the pontoon frame, accounting for the diameter of the PVC pipes. Ensure the planks are strong enough to support the weight of the deck and occupants.
  2. Attach the wooden planks to the PVC pipes using stainless steel screws or bolts, creating a rectangular frame around the PVC pipe. Space the planks evenly around the pipe to distribute weight effectively.
  3. Repeat the process for each pontoon, ensuring that the frames are identical in size and shape.

Step 3: Securing the Pontoons

  1. Connect the two pontoon frames using additional wooden planks, creating a rigid base for the deck. This connection should be strong enough to support the weight of the entire boat.
  2. Use appropriate hardware, such as heavy-duty bolts and nuts, to securely fasten the pontoons together.

Deck Construction

The deck of the pontoon boat provides the platform for seating, storage, and movement. Its construction requires careful attention to detail for a sturdy and functional deck.

Step 1: Framing the Deck

  1. Cut marine plywood to the desired size of the deck. The dimensions should allow for comfortable movement and sufficient space for seating.
  2. Construct a frame around the deck using wooden planks, ensuring that the frame is securely attached to the pontoon base using appropriate fasteners.
  3. Consider adding additional supports within the deck frame for added strength and stability, particularly if the deck is large.

Step 2: Installing the Deck

  1. Attach the marine plywood deck to the frame using screws or bolts. Ensure the screws are long enough to penetrate the plywood and secure it to the frame underneath.
  2. Consider adding a layer of non-slip material to the deck surface for improved safety and traction.

Adding Features

Once the basic structure of the pontoon boat is complete, you can add features that enhance functionality and personalize your vessel.

Seating and Storage

  • Construct benches or chairs using wood or marine-grade materials. Attach them securely to the deck using robust fasteners.
  • Create storage compartments beneath the benches or along the sides of the deck for storing equipment, supplies, or personal belongings.

Navigation and Safety Features

  • Install a steering mechanism, utilizing a simple rope and pulley system or a more advanced tiller steering setup.
  • Mount a motor mount to the back of the deck and secure a suitable outboard motor. Remember to comply with all local boating regulations regarding motor size and horsepower limitations.
  • Include essential safety equipment, such as life jackets, a fire extinguisher, and navigation lights, as required by regulations.

Finishing Touches

After the essential components are in place, you can add finishing touches to enhance the appearance and durability of your pontoon boat.

Painting and Sealing

  • Apply a layer of marine-grade primer to all exposed surfaces of the boat to protect them from the elements and enhance paint adhesion.
  • Use a high-quality marine paint to give the boat a protective finish and a desired color scheme.
  • Seal the deck and other surfaces with a water-resistant sealant for long-term protection against moisture damage.

Additional Features

  • Add a canopy or sunshade for protection from the sun and rain.
  • Install a bimini top for added sun protection and shade.
  • Create custom storage compartments for specific items.
  • Add railings or handrails for increased safety and stability.

Safety Precautions

Before operating your homemade pontoon boat, it is imperative to take necessary safety precautions to ensure a safe and enjoyable experience.

  • Thoroughly inspect the entire structure before each use, paying particular attention to fasteners and connections. Replace any damaged or worn parts.
  • Never exceed the weight capacity of the boat, including passengers, equipment, and supplies. Always adhere to safe loading guidelines.
  • Wear life jackets at all times, even in calm waters. Ensure all passengers have properly fitting life jackets.
  • Follow all boating regulations and safety rules for your local area, including licensing requirements, speed limits, and navigation rules.
  • Avoid boating in hazardous weather conditions, such as strong winds, thunderstorms, or rough waters.

Building a pontoon boat from simple materials is an enjoyable and rewarding project. By following this comprehensive guide, you can create a customized and functional vessel for leisure and enjoyment on the water.

How to Build Your Own Boat: A Comprehensive Guide

How to Build Your Own Boat: A Comprehensive Guide

How to Build Your Own Boat: A Comprehensive Guide

Building your own boat is a rewarding experience that combines creativity, craftsmanship, and a deep connection to the water. It's a journey that requires patience, dedication, and a willingness to learn new skills. This comprehensive guide will walk you through the essential steps, from initial planning to launching your masterpiece.

1. Choosing Your Boat and Design

The first step is deciding what kind of boat you want to build. Consider your intended use:

  • Sailing?
  • Rowing?
  • Motoring?
  • Fishing?

Also, think about the size, materials, and complexity of the design.

Types of Boat Designs

There are numerous boat designs available, each with its own characteristics and construction methods. Some popular options include:

  • Dinghies: Small, lightweight boats perfect for rowing or sailing, often used for recreational purposes.
  • Kayaks: Sleek, water-tight boats designed for paddling, ideal for exploring rivers, lakes, and coastlines.
  • Canoes: Open-top boats that can accommodate multiple passengers and gear, excellent for calm waters and fishing.
  • Small Sailboats: Offer a thrilling sailing experience, ranging from simple day-sailers to more advanced cruising boats.

Finding Plans and Kits

Once you've chosen a design, you'll need to acquire plans or a kit. Plans provide detailed instructions and drawings, while kits offer pre-cut materials and components. Many online resources and boat building suppliers offer a wide selection of plans and kits.

2. Gathering Materials and Tools

After selecting your design, you'll need to gather the necessary materials and tools. This will vary depending on the boat you're building, but some common materials include:

  • Wood: Marine plywood, cedar, mahogany, or other suitable woods for hull construction.
  • Fiberglass: For strengthening the hull and providing a watertight finish.
  • Epoxy Resin: A strong adhesive that bonds wood and fiberglass together.
  • Hardware: Fasteners, fittings, ropes, sails, and other essential components.

Tools you'll need include:

  • Hand tools: Saws, hammers, chisels, planes, sandpaper.
  • Power tools: Drill, sander, jigsaw, router, and possibly a table saw.
  • Measuring tools: Tape measure, ruler, protractor.

3. Building the Hull

The hull is the heart of your boat, providing its shape and structure. The building process will vary based on your chosen design and materials. Here are some common steps:

  • Laying the Keel: The keel is the backbone of the hull, providing stability and strength.
  • Building Frames: Frames are ribs that give the hull its shape. These are usually made of wood and are spaced according to the plans.
  • Sheathing: Sheathing is the outer layer of the hull, often made of marine plywood or fiberglass. It is attached to the frames and keel, creating a strong and watertight shell.
  • Adding Decks and Superstructure: For larger boats, you'll need to build decks, cabins, and other structures on top of the hull.

4. Finishing the Boat

Once the hull is constructed, you need to finish it with paint, varnish, or fiberglass to protect the wood and create a smooth, watertight surface. The finishing process often includes:

  • Sanding: Smoothing the surface of the hull and removing any imperfections.
  • Priming: Applying a primer to the hull to provide a smooth surface for the final coat.
  • Painting or Varnishing: Choosing a paint or varnish that is suitable for marine environments and applying it to the hull.
  • Fiberglassing: For some designs, you might need to add layers of fiberglass to the hull for added strength and watertightness.

5. Launching and Enjoying Your Boat

After finishing your boat, it's time for the exciting moment of launching. Carefully transport your boat to the water and make sure all systems are working properly.

Enjoy your new boat! Now that your hard work has come to fruition, it's time to explore the waters and experience the joy of owning and operating your own creation.

Tips for Building Your Boat

Here are some essential tips to ensure your boat building project is successful:

  • Start with a well-written plan or kit: A good design is crucial for a safe and functional boat.
  • Take your time: Boat building is a process that requires patience and attention to detail.
  • Learn from experienced boat builders: Seek out resources and guidance from those who have built boats before.
  • Join a boat building club: Connecting with other boat builders can offer invaluable support and camaraderie.
  • Safety first: Always prioritize safety when working with tools and materials.

Building your own boat is a challenging but rewarding endeavor. With careful planning, dedication, and a passion for the water, you can create a unique and cherished vessel that will provide countless hours of enjoyment for years to come.

DIY Wooden Canoe Design: Build a Canoe with Simple Materials

DIY Wooden Canoe Design: Build a Canoe with Simple Materials

Build Your Own Wooden Canoe: A Simple Guide

Embrace the timeless tradition of canoeing and embark on a rewarding DIY project by crafting your own wooden canoe. This guide provides a straightforward approach, using readily available materials and techniques, to build a sturdy and elegant watercraft. Let’s get started!

Planning and Design

Before diving into construction, carefully consider the size, shape, and purpose of your canoe. A smaller canoe (12-14 feet) is easier to handle and transport, while a longer canoe (16-18 feet) offers greater capacity. Determine the desired width and depth, considering the number of occupants and intended use. You can find free plans online or purchase them from reputable sources. Alternatively, sketch your own design, ensuring it’s structurally sound and meets your requirements.

Choosing Materials

For a classic look and durability, opt for cedar planks, known for their strength and resistance to rot. Other suitable woods include pine, spruce, and mahogany. You’ll need thin strips of wood for the planking, along with thicker pieces for the keel, stems, and ribs. Consider purchasing pre-cut strips for ease of construction.

Essential Tools and Equipment

Gather the necessary tools for a smooth and successful build. You'll need:

  • Table saw or circular saw
  • Hand plane
  • Clamps
  • Drill with various bits
  • Sandpaper (various grits)
  • Measuring tape and square
  • Chisels
  • Mallet
  • Safety glasses and gloves

Building the Canoe Frame

The frame provides the structural integrity of the canoe. This is where the keel, stems, ribs, and thwarts (seat supports) are assembled. The keel runs along the length of the canoe, acting as the backbone. The stems are the curved pieces at the bow and stern. Ribs, usually made of flexible wood, provide cross-sectional support and shape the canoe's hull. The thwarts are positioned to provide seating and stability.

Assembling the Frame

Begin by constructing the keel and attaching the stems. Use glue, screws, or a combination of both to join the pieces securely. Then, install the ribs, ensuring they are spaced correctly and have a gentle curve. The thwarts are added later, once the planking is complete.

Planking the Hull

Now, it’s time to create the canoe’s smooth, watertight hull. Planking involves attaching thin strips of wood (planks) to the frame in overlapping layers. The planks are carefully shaped and fitted to the frame, using techniques like steaming and bending to achieve the desired curve.

Applying the Planks

Secure the planks to the frame with epoxy or marine glue and screws or rivets. Each plank is placed so that it overlaps the previous one, creating a strong and watertight seal. This process can be time-consuming but rewarding as you see the canoe take shape.

Finishing Touches

After completing the planking, the canoe requires finishing to protect the wood and enhance its appearance.

Sanding and Finishing

Sand the hull thoroughly, starting with coarse grit sandpaper and gradually moving to finer grits. This process smoothes out the surface and prepares it for the final finish. Consider applying a layer of varnish or marine paint to seal the wood and protect it from the elements.

Adding Accessories

Outfit your canoe with essential accessories, such as seats, gunwales (top rails), and carrying handles. Consider adding a protective coating of wax to the exterior to enhance water resistance.

Launching and Enjoying Your Canoe

Once your canoe is complete, it’s time for the exciting moment â€" launching it into the water. Take your time and follow safety precautions. You’ll be amazed at the sense of accomplishment and pride as you glide across the water in your handcrafted canoe.

Building your own wooden canoe is a challenging but rewarding experience. It’s a labor of love that results in a timeless watercraft you’ll cherish for years to come. Enjoy the journey!

How to Create Your Own Boat: A BeginnerÂ’s DIY Guide

How to Create Your Own Boat: A Beginner’s DIY Guide

How to Create Your Own Boat: A Beginner’s DIY Guide

Embarking on the journey of building your own boat can be a rewarding and fulfilling experience. This comprehensive beginner's guide will equip you with the essential knowledge, tools, and techniques to navigate this exciting project. From conceptualizing your dream vessel to launching it into the water, we will cover all the key aspects, ensuring a smooth and successful DIY boatbuilding adventure.

Conceptualizing Your Boat

The first step in crafting your boat is to envision its purpose and design. Consider the following factors:

Purpose

What will your boat be used for?

  • Will it be primarily for recreational purposes, such as fishing, cruising, or waterskiing?
  • Or will it be designed for more specialized activities, like racing, exploration, or cargo transportation?
  • Size and Shape

    Determine the optimal size and shape for your intended use.

  • Smaller boats are more maneuverable but have limited capacity, while larger boats offer greater stability and carrying capacity.
  • The hull shape, such as displacement or planing, influences the boat's speed, stability, and efficiency.
  • Materials

    Consider the materials that best suit your budget, skills, and desired aesthetics.

  • Fiberglass is a popular choice due to its strength, durability, and affordability.
  • Wood offers a classic look and is a good option for skilled woodworkers.
  • Aluminum is lightweight and corrosion-resistant, making it suitable for high-performance boats.
  • Gathering Materials and Tools

    Once you have a clear concept, it's time to gather the necessary materials and tools. This list will vary depending on your specific design and chosen materials, but here are some essential items:

    Materials

    • Hull panels: Fiberglass, wood, or aluminum
    • Stringers and frames: Wood or aluminum
    • Deck panels: Marine plywood or fiberglass
    • Engine and drive system: Outboard, inboard, or jet drive
    • Steering and control systems: Wheel, cables, and hydraulics
    • Hardware: Fasteners, cleats, hinges, and other fittings
    • Finish: Paint, varnish, or gelcoat

    Tools

    • Hand tools: Saw, hammer, drill, screwdriver, wrenches, measuring tape, and levels
    • Power tools: Circular saw, jigsaw, router, sander, and grinder
    • Fiberglassing tools: Roller, brush, squeegee, and mixing bucket
    • Safety gear: Gloves, respirator, eye protection, and ear protection

    Building the Hull

    Constructing the hull is the foundation of your boat. The process will depend on your chosen materials and design, but here are general steps:

    Planking or Sheathing

    For wooden boats, planking involves attaching thin strips of wood to the frame, creating the hull's exterior. For fiberglass boats, sheathing entails applying fiberglass panels over a molded or built-up framework.

    Laminating

    Fiberglass boats are typically constructed using a process called lamination. This involves layering resin-soaked fiberglass cloth over the hull, followed by curing to create a strong, waterproof shell.

    Fairing

    After the hull is built, it needs to be faired, which involves smoothing out any irregularities or imperfections. This is usually done with a combination of sanding and filling.

    Building the Deck and Interior

    Once the hull is complete, the deck and interior can be constructed. This involves:

    Deck Construction

    The deck is typically made from marine plywood or fiberglass. It is attached to the hull, and the necessary openings, such as hatches and cockpit areas, are cut out.

    Interior Fittings

    The interior of your boat can be outfitted with seating, storage, electrical systems, and other amenities based on your preferences and intended use.

    Installing the Engine and Drive System

    Choosing the right engine and drive system is crucial for your boat's performance. Consider factors like:

    • Horsepower: Determines the speed and acceleration of your boat.
    • Type of engine: Outboard, inboard, or jet drive, each with its own advantages and disadvantages.
    • Drive system: Outboard, inboard, or stern drive, each with its own installation and operation characteristics.

    The engine and drive system must be properly mounted and aligned to ensure optimal performance and prevent damage.

    Finishing and Launching

    The final steps involve finishing your boat and preparing it for launch:

    Painting or Gelcoat

    Apply paint or gelcoat to protect the boat from the elements and enhance its appearance. Use marine-grade paints and follow recommended application techniques.

    Installing Hardware

    Attach essential hardware, such as cleats, hinges, handrails, and other fittings, ensuring they are securely installed and meet safety regulations.

    Launching

    Before launching your boat, perform a thorough inspection and ensure all systems are operational. Carefully launch the boat into the water and test it in a controlled environment before heading out on your first adventure.

    Safety Precautions and Regulations

    Boatbuilding involves working with tools and materials that can be hazardous if not handled properly. Here are some essential safety precautions:

    • Wear protective gear, including gloves, respirators, eye protection, and ear protection.
    • Follow the manufacturer's instructions for all tools and materials.
    • Work in a well-ventilated area, especially when using resins and paints.
    • Be aware of the risks associated with working with power tools and machinery.
    • Adhere to all local boating regulations, including licensing, registration, and safety equipment requirements.

    Conclusion

    Building your own boat can be a challenging yet immensely rewarding endeavor. By following this comprehensive guide, you'll gain the knowledge and skills needed to navigate this exciting DIY project. Remember to prioritize safety, plan meticulously, and enjoy the process of bringing your dream boat to life. With dedication, patience, and a touch of nautical ingenuity, you'll soon be ready to set sail on your own custom-built vessel.

    How to Build a Pontoon Boat for Fishing, Relaxing, and More

    How to Build a Pontoon Boat for Fishing, Relaxing, and More

    Building Your Dream Pontoon Boat: Fishing, Relaxing, and More!

    Hey there, water lovers! You're probably reading this because you're dreaming of cruising the lake in your own custom pontoon boat. Maybe you want a sleek fishing machine, a spacious party barge, or something in between. Building a pontoon boat might seem daunting, but trust me, it's a rewarding project that gives you complete control over your boat's design and features. Let's dive into the exciting world of pontoon boat construction!

    Planning Your Pontoon Dream

    Before you jump into the deep end, it's essential to have a solid plan. Think about how you want to use your pontoon. Are you a hardcore angler looking for a casting platform? Do you envision sunbathing on a spacious deck with friends and family? Or maybe you're all about hitting the wakeboard ramp with a powerful engine? Here's a breakdown of the planning steps:

    1. Design and Size

    Sketch out your dream pontoon! Consider:

    • Length: This determines capacity and stability. A smaller pontoon is more maneuverable but has less space. A longer pontoon provides more room but might be harder to handle.
    • Width: Wider pontoons offer more stability, especially in choppy water, but take up more space when storing and transporting. Narrower pontoons are more nimble but may be less stable in rough conditions.
    • Number of Pontoons: Two pontoons are standard for stability, but some larger boats have three.
    • Deck Design: Do you want a simple, open deck or something more intricate with seating, storage, and amenities?
    • Cabin or Canopy: A cabin provides shade and protection from the elements. A canopy offers sun protection.
    • Fishing Features: Consider rod holders, livewells, and fish finders.

    2. Choosing Materials

    Pontoon boat construction involves various materials:

    • Pontoons: Aluminum is popular for its durability, corrosion resistance, and affordability. Fiberglass pontoons are lighter but more expensive.
    • Deck: Wood (like marine-grade plywood) is affordable and easy to work with. Aluminum or fiberglass decks are more durable and require less maintenance.
    • Frame: Aluminum tubing is lightweight and strong, making it a common choice for pontoon frames.
    • Hardware: Use marine-grade hardware for longevity. Stainless steel resists rust and corrosion.

    3. Budget

    Pontoon boat construction costs vary depending on size, materials, and features. Here are some factors to consider:

    • Materials: Aluminum is typically more affordable than fiberglass.
    • Engine: A larger, more powerful engine will cost more.
    • Features: Adding amenities like cabins, seating, and electronics will increase the cost.

    The Construction Process

    Building a pontoon boat is a multi-step process that requires careful planning and execution. Here's a general overview:

    1. Assemble the Pontoons

    Start by assembling the pontoon hulls according to the manufacturer's instructions. This often involves welding or riveting aluminum sections together. If you're working with fiberglass pontoons, you'll need to carefully mold and reinforce them.

    2. Build the Frame

    The frame supports the deck and provides structure to the boat. Use aluminum tubing to construct a sturdy frame. Make sure to reinforce areas that will experience stress, like the transom where the engine mounts.

    3. Install the Deck

    Attach the deck boards to the frame. You can use marine-grade plywood for affordability or aluminum or fiberglass for durability. Make sure to seal any exposed edges to prevent moisture damage. Consider using a deck plan to ensure you have enough room for seating, storage, and other features.

    4. Install Features

    Now it's time to add your desired features:

    • Seating: Choose comfortable and durable seating options, such as bench seats, swivel chairs, or custom-built seating.
    • Storage: Install storage compartments under the deck or beneath seats to keep your gear organized.
    • Cabin or Canopy: If you've opted for a cabin or canopy, attach them to the frame and ensure proper sealing and waterproofing.
    • Fishing Features: Install rod holders, livewells, and fish finders according to your fishing needs.

    5. Install the Engine and Steering

    Attach the engine to the transom. Make sure to follow the manufacturer's instructions for proper mounting and alignment. Install the steering system, including the steering wheel, cables, and hydraulics, ensuring smooth and responsive steering.

    6. Finishing Touches

    Now comes the fun part - adding the finishing touches to your pontoon boat! Paint or stain the deck and trim. Add any personal touches, like decals, lighting, and accessories.

    7. Test and Enjoy

    Once your pontoon is complete, take it for a test run. Check for any leaks or issues. Adjust your engine settings for optimal performance. Once you've ironed out any kinks, it's time to enjoy your custom pontoon boat!

    Tips for Building a Pontoon Boat

    Here are some tips to help you along the way:

    • Safety First: Wear safety gear like gloves, goggles, and a respirator when working with power tools and hazardous materials.
    • Work in a Well-Ventilated Area: Ensure good airflow when working with paint, fiberglass, and other potentially harmful materials.
    • Seek Professional Help: If you're not comfortable with certain aspects of the construction process, don't hesitate to seek professional help.
    • Research Regulations: Check local and state regulations for boat construction and registration requirements.
    • Document Your Progress: Take pictures and keep a detailed log of your construction process. This will be helpful if you need to troubleshoot any problems or make modifications.

    Enjoying Your Custom Pontoon Boat

    Congratulations! You've built your own custom pontoon boat. Now you can enjoy endless hours of fishing, relaxing, and making memories on the water. Remember, the most important part is having fun and creating a boat that's perfect for you and your crew!

    Happy boating!